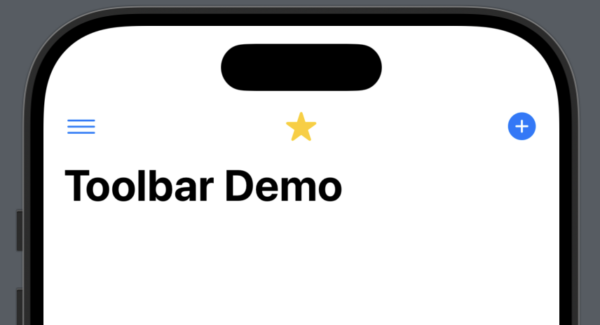
In this tutorial, we’ll add Buttons to a NavigationStack toolbar and position them correctly according to your needs. To demonstrate what can be done, we’ll add animations to the buttons based on the SF Symbols tutorial.

Learn How to Create iOS Apps
In this tutorial, we’ll add Buttons to a NavigationStack toolbar and position them correctly according to your needs. To demonstrate what can be done, we’ll add animations to the buttons based on the SF Symbols tutorial.
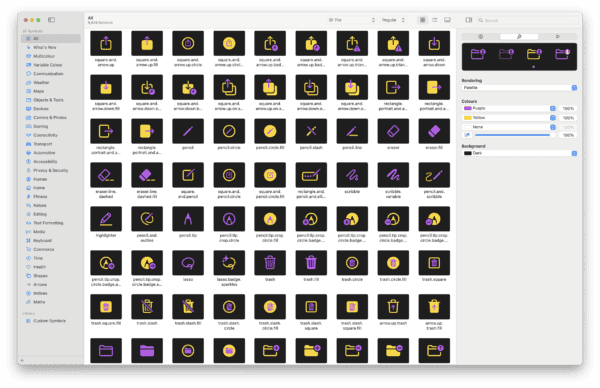
Apple’s SF Symbols is a large amount of scalable icons that integrate with SwiftUI. The library has over 6,000 icons ready for you to use in your iPhone app.
Symbols come in nine weights and three scales, automatically align with text, and can be exported and edited using vector graphics editing tools to create custom symbols with shared design characteristics and accessibility features.
To help you find symbols to use in your app, Apple provides the SF Symbols app that you can download to a Mac to browse through the library. You can find details here.
In this tutorial we’ll look at how to use symbols and how to modify characteristics to suit the look and feel of your app.
[Read more…]The pull-to-refresh gesture has been around since the early days of the iPhone when Tweetie launched in around 2008. It provided a way for a table view to refresh by swiping down to a point where the refresh was triggered.
Apple introduced it in the UIRefreshControl class in iOS 6. In iOS 15 in 2021, Apple added support natively to SwiftUI.
It is now known as refreshable and is an instance method in the View. Lets take a look at how it works.
[Read more…]Some apps use an onboarding flow to take users through some of the features as well as help get things set up, such as permissions. In this tutorial we’ll create a simple onboarding experience using the TabView and PageTabViewStyle so that your users can swipe through the introduction screens.
We will also make use of @AppStorage to store that the user has seen the onboarding screens and doesn’t need to see them again.
[Read more…]In iPhone apps, there comes a time when you might need to show an alert to a user to ask them for input. Apple provides the alert instance method on a view for you to use. This particular instance method is for iOS 15 and later. Here is how you use it:
struct ContentView: View {
@State private var showAlert = false
var body: some View {
VStack {
Button("Show Alert") {
showAlert.toggle()
}
.alert(
"Important Message", // Title of the alert
isPresented: $showAlert, // Binding to show the alert
actions: {
Button("Allow") {
// Action when "Allow" button is pressed
print("User pressed Allow")
}
Button("Don't Allow", role: .destructive) {
// Action when "Don't Allow" button is pressed
print("User pressed Don't Allow")
}
},
message: {
Text("Do you want to allow this action?")
}
)
.padding()
}
}
}
In a few of the tutorials here, we have used URLSession to download data. Rather than skip over it as something that is used as part of a project, I thought I best create a tutorial on how to use it so that you can grasp what it is and what it is doing, as well as what else can be done with it.
URLSessions are useful for various reasons which include communicating with an external server to download large datasets, sending information to a server, particularly a backend service or image upload service, and many more uses. URLSession is the built in way of coordinating network data transfer tasks.
[Read more…]In this tutorial we will be looking at how to use async/await as well as the Task struct, which is a unit of asynchronous work. If you are new to these terms, then by the end of this, you’ll have a greater understanding of what they are and how they can benefit your app.
The project we will write today will reach out to a server to fetch a JSON response that contains users. In the tutorial we will see how we can use Task to make this work. We will also use async/await and see where this is needed.
[Read more…]In this tutorial we’ll be looking at how to create your own custom button style. Although SwiftUI does provide great default styles, many apps use their own style to match the unique design of their app. This can be accomplished with the ButtonStyle protocol that allows you to chose different effects from colours to shadows and then apply the style across all Buttons in the app giving a consistent style that can easily be altered if needed.
First, create a struct that conforms to ButtonStyle:
struct CustomButtonStyle: ButtonStyle {
var buttonColor: Color?
var shadowRadius: CGFloat?
func makeBody(configuration: Configuration) -> some View {
configuration.label
.padding()
.background(Color(buttonColor ?? Color.blue))
.foregroundColor(.white)
.cornerRadius(10)
.shadow(radius: shadowRadius ?? 0)
.scaleEffect(configuration.isPressed ? 0.95 : 1.0)
.animation(.easeInOut(duration: 0.2), value: configuration.isPressed)
}
}
In this code, we have two optional variables that allow us to either take a colour parameter and radius parameter, or just let the custom button set to defaults.
The makeBody method defines the visual appearance and behaviour of the button. Here you can set what it will look like. makeBody is required by the ButtonStyle protocol, so must be implemented.
[Read more…]Over the next few weeks I will be revisiting some of the older tutorials on this site from several years ago. Today I updated How to Use HealthKit HKAnchoredObjectQuery to be compatible with iOS 18. Almost all of it was good, although I feel it needs another look at, this time using SwiftUI to build a view for it so you can visually see the data and the anchor.
The screenshot you see shows what you will be building with your own data from HealthKit.
Begin by creating a new Xcode project selecting SwiftUI. When loaded, there are a few steps to take to get the app ready to access HealthKit data. One is a permission adjustment in info.plist so that the user can be prompted to give permission. The second is the HealthKit entitlement. Let’s look at these now.
The iPhone is able to detect if you are walking, running, stationary, in a vehicle, or on a bike by using the motion sensors in the device. Back in 2018 I wrote about this in the tutorial called How to Use the CMMotionActivityManager. Today, we’ll update this for SwiftUI.
Since the iPhone 5s, iPhone has been able ot automatically track your activity, that being if you are stationary, in a vehicle, on a bike, and so on. iPhone keeps this data for seven days. You may have noticed when you were in a vehicle that the phone detects if you are driving and so on.
Core Motion provides a way for you to access this seven-day historical data as well as receive live updates on your current activity.
In this tutorial we’ll look at how to access this information to give an overview of your current day and what you have been doing.
It is important to note that the information provided by Core Motion has a confidence level. In the screenshot above you can see that I am stationary, but its confidence level is low. Now I was stationary when taking the screenshot, but the movement of the phone probably lowered that confidence level to low.
[Read more…]