I have written about MapKit a few times before such as a tutorial about adding a Map to your SwiftUI app and the MKPointAnnotation tutorial from back in 2013, which uses Swift and UIKit.
In this tutorial we’ll look at using the Annotation and Marker structures that provide the means to getting annotations on your map to mark locations.
SwiftUI makes it easy to display locations on a map. For apps that target iOS 16 or later, Annotation and Marker are the way to go. For those that are targetting lower versions of iOS the equivelant to Marker is MapMarker and the equivalent of Annotation is MapAnnotation. Today we’ll look at Marker and Annotation.
A Look at using Marker in a SwiftUI Map
Out of the two options, Marker is the easiest to work with and can be used if you are not interested in visual customisation. It provides a system-styled pin and allows for a custom image, label, and colour. It can be implemented as follows:
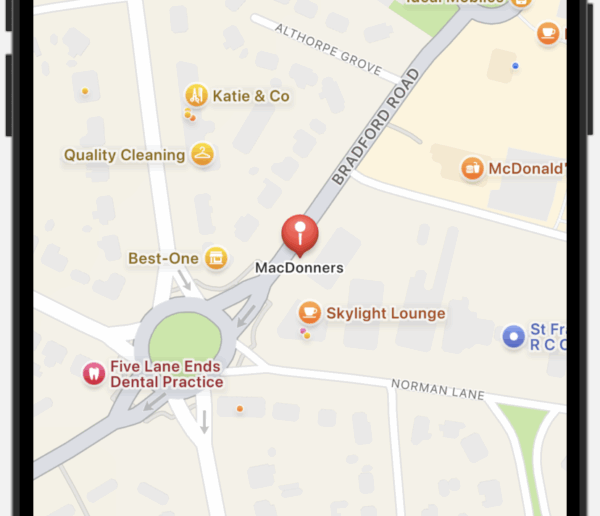
Marker("MacDonners", coordinate: annotation.coordinate)
                                    .tint(.red)
You put the Marker inside your Map and pass it a name, coordinate, and colour. It creates a pin like seen in the centre of the image posted above. You also have the option of adding a custom system image (see how to use SF Symbols for how to find the system image you need)
Lets take a look at how to actually use this. First, we’ll define a structure to hold the details of the Marker:
struct CustomMarker: Identifiable {
    let id = UUID()
    let coordinate: CLLocationCoordinate2D
    let title: String
    let image: String
    let colour: Color
}
We will be using the CustomMarker in a ForEach in the view. For this reason, we mark it as Identifiable. This struct has a coordinate, a title, an image, and a colour. The image is a String because we specify systemImage with a string which you will see later.
Now lets create an array of CustomMarker:
var markers: [CustomMarker] {
    [
        CustomMarker(
            coordinate: CLLocationCoordinate2D(latitude: 53.8240, longitude: -1.7360),
            title: "MacDonners",
            image: "fork.knife.circle.fill",
            colour: .blue
        ),
        CustomMarker(
            coordinate: CLLocationCoordinate2D(latitude: 53.8234, longitude: -1.7348),
            title: "Eccleshill Mechanics Institute Library",
            image: "books.vertical.fill",
            colour: .red
        ),
        CustomMarker(
            coordinate: CLLocationCoordinate2D(latitude: 53.8238, longitude: -1.7385),
            title: "Eccleshill Swimming",
            image: "drop.fill",
            colour: .green
        ),
        CustomMarker(
            coordinate: CLLocationCoordinate2D(latitude: 53.8242, longitude: -1.7352),
            title: "Nafees Bakers",
            image: "birthday.cake.fill",
            colour: .purple
        ),
        CustomMarker(
            coordinate: CLLocationCoordinate2D(latitude: 53.8237, longitude: -1.7362),
            title: "Curryosity Indian Takeaway",
            image: "takeoutbag.and.cup.and.straw.fill",
            colour: .brown
        ),
        CustomMarker(
            coordinate: CLLocationCoordinate2D(latitude: 53.8250, longitude: -1.7364),
            title: "Eccleshill Working Men's Club",
            image: "person.3.fill",
            colour: .blue
        ),
        CustomMarker(
            coordinate: CLLocationCoordinate2D(latitude: 53.8235, longitude: -1.7375),
            title: "Bargains",
            image: "cart.fill",
            colour: .green
        )
    ]
}
Here we pass in the coordinate of the Marker, the title, image, and the colour.
Put the above array in the ContentView and also add this @State property wrapped variable:
struct ContentView: View {
    @State private var region = MKCoordinateRegion(
        center: CLLocationCoordinate2D(latitude: 53.824, longitude: -1.7365),
        span: MKCoordinateSpan(latitudeDelta: 0.005, longitudeDelta: 0.005)
    )
This is used for when we add our Map to the view. We pass it a region which has a centre and a span and essentially sets the location and zoom level that is put on the view when the app opens.
With that in place and our array of markers just below it, you can now add in the body:
var body: some View {
    Map(initialPosition: .region(region)) {
        ForEach(markers) { marker in
            Marker(marker.title,
                   systemImage: marker.image,
                   coordinate: marker.coordinate)
                .tint(marker.colour)
        }
    }
    .edgesIgnoringSafeArea(.all)
}
This is very easy to implement in SwiftUI because the framework does a lot of the lifting work.
Line 2, we add a Map to the view and pass in our region as the initialPosition of hte map. Towards the end we add this modifier: .edgesIgnoringSafeArea(.all).
Within our Map we have a ForEach that loops around the markers we created and for each iteration it adds a Marker to the view by setting its title, systemImage, and coordinate. After the Marker we add a modifier to set the colour.
If you go ahead and preview the Map now you will see Markers in various locations. Although most of the annotations are made up, I set the span so that all of them fit in the view on the Preview.
If you need to interact with the Markers then you are best using the Annotation structure that allows more customisation and specifically adds a .onTapGesture.
Using Annotation in a SwiftUI Map
If you want to just show pins on a map then Marker is the way to go, but if you need customisation then go with Annotation.
struct CustomAnnotation: Identifiable {
    let id = UUID()
    let coordinate: CLLocationCoordinate2D
    let title: String
    let image: String
    let colour: Color
}
Rename the struct from earlier. This isn’t mandatory but makes it easier to remember that we’re now working with an Annotation and not a Marker.
You can use the same array of markers, just renaming to annotations and renaming each item in the array to CustomAnnotation.
You can also keep the same region as the tutorial earlier, but add in the following @State variable.
@State private var selectedTitle: String? = nil
This will be used to update the view when an annotation is tapped.
var body: some View {
    ZStack(alignment: .top) {
        Map(initialPosition: .region(region)) {
            ForEach(annotations) { annotation in
                Annotation(annotation.title, coordinate: annotation.coordinate) {
                    VStack(spacing: 4) {
                        Image(systemName: annotation.image)
                            .font(.title)
                            .foregroundColor(annotation.colour)
                            .padding(8)
                            .background(Circle().fill(Color.white))
                            .shadow(radius: 3)
                            .onTapGesture {
                                selectedTitle = annotation.title
                            }

                        Text(annotation.title)
                            .font(.caption2)
                            .padding(4)
                            .background(.ultraThinMaterial)
                            .cornerRadius(4)
                    }
                }
            }
        }
        .edgesIgnoringSafeArea(.all)

        if let selectedTitle = selectedTitle {
            Text("You tapped: \(selectedTitle)")
                .padding()
                .background(.thinMaterial)
                .cornerRadius(10)
                .shadow(radius: 4)
                .padding()
                .transition(.move(edge: .top))
        }
    }
}
This time we’re going to use a ZStack so that we can display some text on the map to show which annotation was tapped. Putting it in a ZStack means that the Text we use on line 29 is in front of the map and not behind it.
Initialise the Map on line 3 like done previously and add the ForEach on line 4.
This time we declare an Annotation instead of a Marker and pass in the title and coordinate.
Rather than passing in the image here, we nest a VStack and put an Image view and Text view inside. This section from the end of line 5 to line 23 is used to put our custom view in there. I opted for an Image with the annotation.image being that image, and annotation.title being the Text.
On line 13 we have the .onTapGesture that sets the selectedTitle to the annotationTitle on line 14. selectedTitle uses the @State property wrapper and when it changes, it updates the view and because of the if let on line 28, it will show the text view at the top of the Map just in front of it. Of couse, line 14 in the onTapGesture you could do anything you like here such as change to another view or a dialog to show more information.
Marker and Annotation are great for showing items on the map. Unlike MKPointAnnotation where you need to use dequeueReusableAnnotationView for efficiency, this is all built in on Marker and Annotation and you simply need to provide the title, coordinate, image, colour, and a custom view where needed.
Any questions, please ask below.
Leave a Reply
You must be logged in to post a comment.