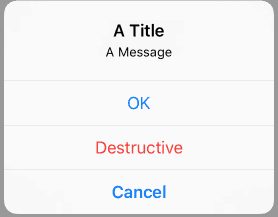
 When needing to put an alert on the view of your app the previous way to handle this was with a UIAlertView or UIActionSheet. Both of these were deprecated in iOS 8 which means if you are targeting newer versions of iOS, which you should be in many cases, you now need to use UIAlertController. If you want to see how alerts worked in iOS 8 or below, you can find an example in the Location Authorization tutorial we made a few years ago.
The UIAlertController
UIAlertController became available in the iOS 8.0 SDK. Rather than go through the differences between this class and the previously used classes we’ll just look at what can be done with the UIAlertController. [Read more…]